I have upgraded our Ultima 5th wheeler to an imported Rockwood Ultralite 2622RK 5th wheeler made by Forest River. The lithium batteries, the Electrodacus BMS and almost all the other electronics have either been swapped over or replaced with identical products. The solar panels were left on the Ultima, however I am in the process of adding 800w of solar, in addition to the 190w of solar that was fitted in the manufacture.
Some products listed below may now be redundant or still used that are not really necessary. My lithium batteries are installed and up and running, however I am continually fine tuning some of system. As I do upgrades I do try to update my blog pages, however sometimes updating one area, makes another area contradict update. This is a hobby, I like sharing what I do.
Part of the joy of owning an RV is the ongoing updates that we do to get the most out of our camping (glamping) experience. I have been planning to update my AGM batteries to Lithium for a couple of years now. Lots of reading has been the focus of my planning. Lithium batteries have an expensive start up cost, however in the long run I think the initial cost will be offset by the extra lifespan, which will hopefully save money in the long run and I will also have the ability to run some 240v appliances off an inverter. Time will tell.
There are two ways of installing Lithium batteries, one is to buy a 12v battery with inbuilt BMS (battery management system) or build your own using individual cells and create your own BMS. I have chosen the latter, for two reasons, one that it will lower the cost and two, I enjoy the challenge to create a personalised setup.
Initial battery setup
2 x 10⁵ah Full River AGM batteries
2 x 130w Solar Panels = 260w of charging
Manson 30a PWM Solar Controller
Original Power supply 3 stage battery charger
Anderson plug from tow vehicle via 50a anderson plug with 6B&S 13mm² cable to provide charge while mobile via a Redarc Isolator to prevent ute battery being discharged when the engine is not running.
Updated Setup
Batteries
A link to my blog page about the batteries
400ah RJ Energy Lithium Battery 8 x 200ah cells (original batteries still performing well 1/7/2020, although their capacity is starting to reduce with age)
BMS
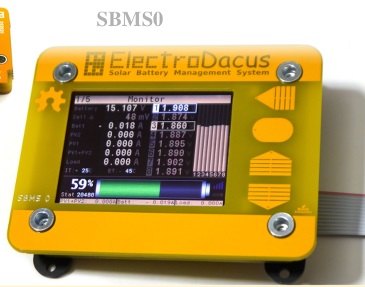
A link to my blog page about the Electrodacus SBMS0
I have installed an Electrodacus SBMS0 BMS to control and protect my lithium batteries
580 Watts of Solar
The original 2 x 130w Solar Panels were used, plus four more panels that were added recently, 2 x 100w Solar Panels and 2 x 60w Solar Panels, giving a total of 580w of solar. They are all added as separate 12v panels in parallel. If I was starting from scratch I may have added panels of the same wattage and/or joined the them together in lots of 2 in series. This would allow for smaller wires running down to the solar controller.
580w of solar, still room for more, although shadowing from air conditioning and antenna will be a problem
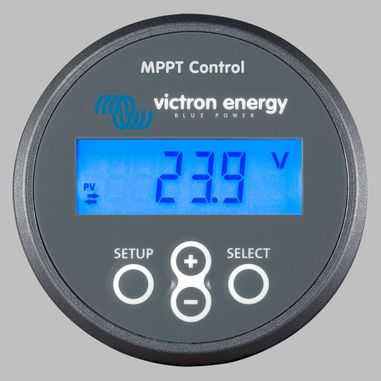
Solar Controller
Victron SmartSolar MPPT 150/60-Tr
![]()
The Victron Smartsolar can be monitored and programmed via Bluetooth and can be remotely controlled via a remote on/off switch with the SBMS0
Victron DC/DC Charger
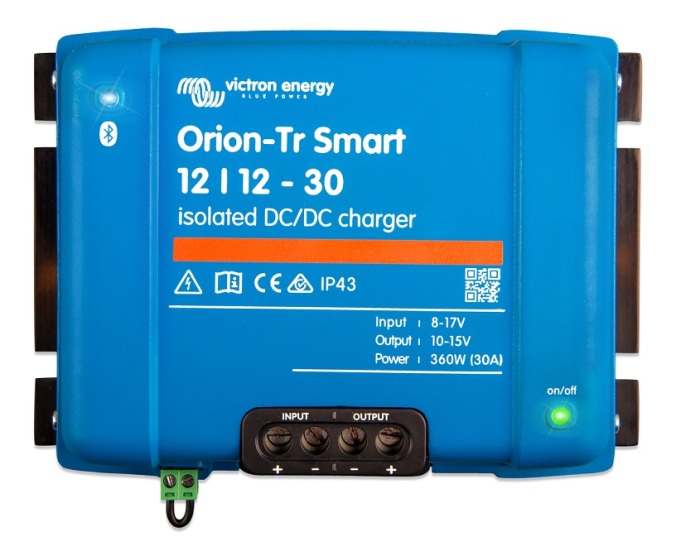 The Victron Orion can be monitored and programmed via Bluetooth and can be remotely controlled via a remote on/off switch with the Electrodacus SBMS0
Victron Smart Battery Protect 220a
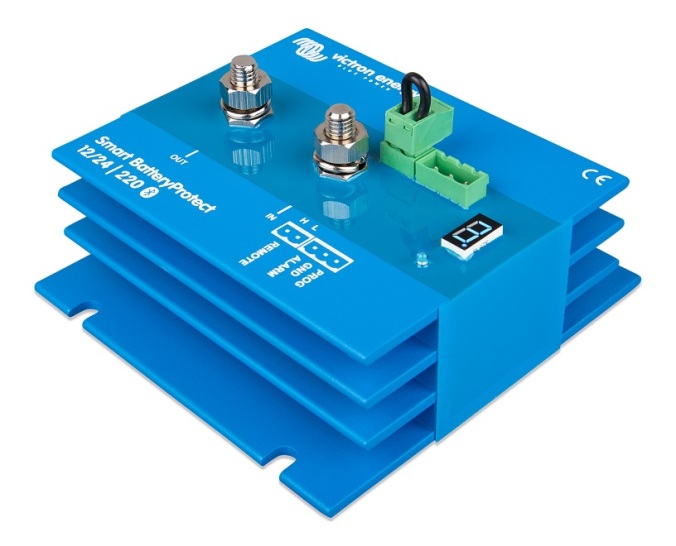
The Victron Smart Battery Protect 220a can be monitored and programmed via Bluetooth and can be remotely controlled via a remote on/off switch with the Electrodacus SBMS0
Victron Battery Monitor
Easily monitor battery capacity with this remote gauge from inside the 5th wheeler
The Victron battery monitor would have to be the single most important addition to our 5th wheeler. I was very surprised how useful and beneficial this little device is. I only use a small part of what this device is capable of. I have it programmed to trip the remote battery isolator if battery voltage drops below a user set voltage. I also have the battery capacity programmed into it as well and along with a user programmable low battery limit, set at 50% for a Gel battery or as low as 20% for a lithium battery. This allows me to monitor the actual power available to safely draw from our battery pack without prematurely shortening its life span.
Installing the battery monitor did highlight how much difference there was in solar charging ability between summer and winter. In summer with the sun higher in the sky there is much better charging (for longer) than in winter as the sun is lower in the sky (for less time), especially with roof mounted panels. This helped make the decision to add more panels to the roof of the 5th wheeler
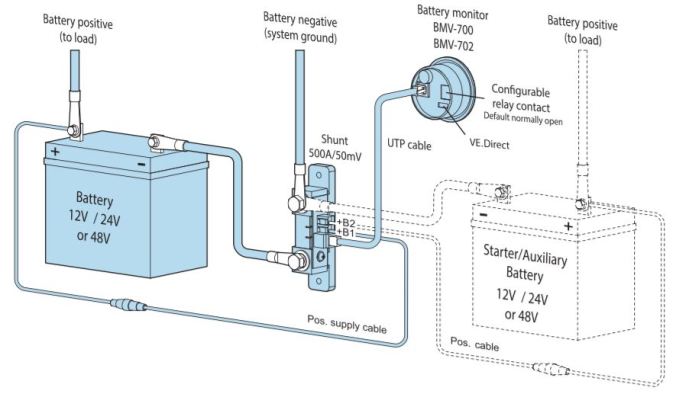
The Victron 702 is a fuel guage for your battery. It can be setup to monitor an auxilary battery as well. There is a bluetooth model now with updates available on your phone
With the SBMS0 upgrade the Victron 702 is not really needed now as it is doubling up on monitoring, however I am going to leave it in use and plan to add a bluetooth dongle to view and make changes easily
BEP Remote Operated Isolator
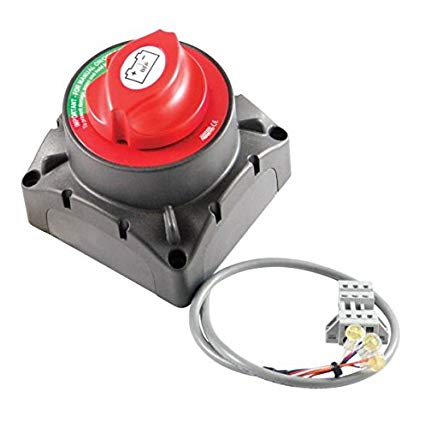
I installed a remote battery isolator to protect batteries from being discharged below safe levels. I have it connected to the Victron battery monitor (above), which has been set to isolate the battery at 11.5v (although it can be be set at any voltage you like). This is great if you leave a light on or anything that drains the battery, especially after coming home after a trip. This will prevent the battery draining completely and ruining your battery bank
This is not really needed now as well, however I do have it so I can isolate the inverter
Intervolt Sensing Relay
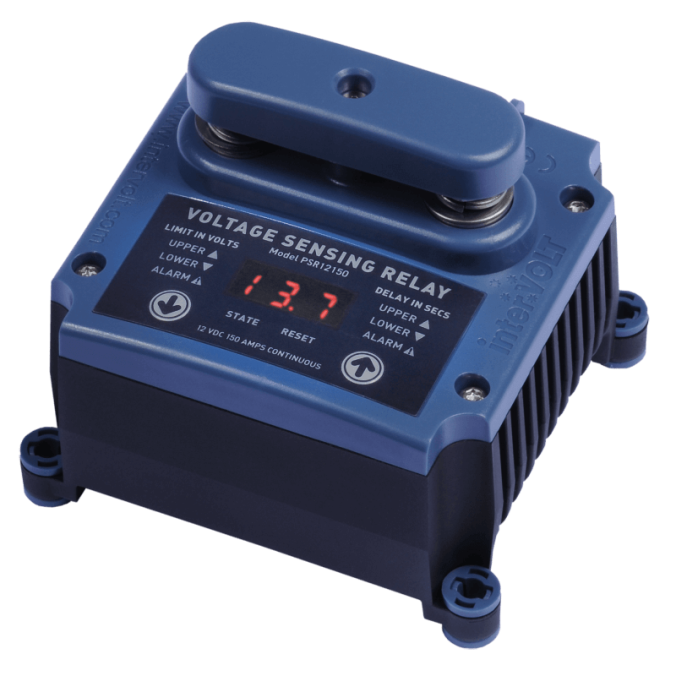
Fully programmable settings easily set to suit your individual needs
I have installed an Intervolt Sensing Relay as a charging Isolator for High Voltage Isolation (disconnect 240v charging system) when lithium batteries are installed. The relay was installed to disconnect the 240v battery charger to prevent overcharging of the lithium batteries, not really needed now, it has been left installed although not needed.
I was using this relay to stop charging via the 240v charger, however I have made this redundant as well
Projecta 35a 7 Stage BatteryCharger
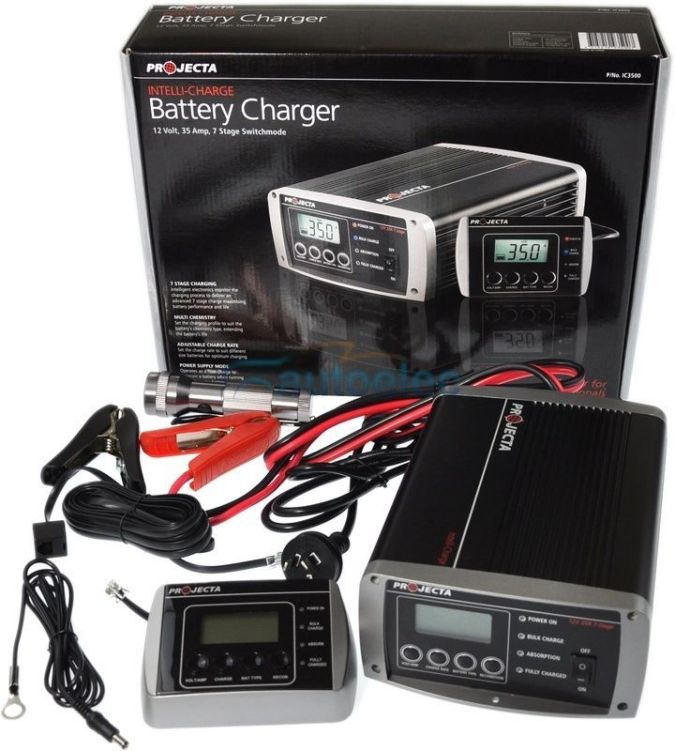
Projecta 35a charger with remote control unit that I have installed inside the van next to battery monitor. This battery charger comes in several different rating up to 50a, you can choose a size that suits your needs or budget. I also use a 25a version as a workshop battery charger.
I have upgraded to a Victron 35a 7 Stage Battery Charger that can be run as a 13.8v power supply for when lithium batteries are finally installed.
The SBMS0 may be able to control charging by adding a remote switch in series to the on/off switch in a future update
Giandel 2800w(5600w peak) Pure Sine Wave Inverter
I have added a Giandel 2800w inverter to allow us to run some 240v appliances.
The remote control is also mounted inside the van as the inverter is mounted near the batteries in the front boot
I have mounted a reasonably large inverter in the front boot of the 5th wheeler to run some of the larger 240v appliances in the van. This allows the use of short leads from the battery to the inverter. With the extra panels that I have installed, we have the ability to run the microwave and maybe the 3 way fridge when there is an abundance of solar charging.
I am presently connecting the inverter to the external connection of the 5th wheeler, using a small extension cord. As long as the battery charger, the air conditioner and other high drain appliances are turned off, it works quite well, although it must all be done manually and it is easy to forget to turn off an appliance. This is done when setting up camp and is no different than hooking up to an external power source.
Once connected the remote switch for the inverter, inside the van, allows for easy switching the inverter on and off, so 240v power is easily accessible at the flick of a switch. This also gives us the ability to use all the available 240v power points to run items, such as the laptop charger, along with other small appliances around the van. I may improve this at a later time if it proves unsuitable.
